Troubleshooting Seed Germination Success
Seeds Not Germinating? Try These Fixes to Get Your Garden Growing
If you're an avid gardener, you know the frustration of seeds not germinating properly. Whether you're planting a small herb garden or starting a whole farm, it's upsetting to see no progress after all your hard work. But before you give up on your gardening dreams, there are several fixes you can try to get your seeds to germinate.
In this article, we'll explore some of the most common reasons why seeds fail to sprout and offer solutions to help you overcome these obstacles. Are seeds not germinating? Try These Fixes and start your gardening journey anew.

I. Common Reasons Why Seeds May Not Germinate
- Poor quality seeds: style="font-weight: 400;"> Poor quality seeds, such as those that have been stored improperly or are too old, may not germinate.
- Incorrect planting depth: Seeds need to be planted at the correct depth for successful germination. If they are planted too deep or too shallow, they may not receive the right amount of moisture and oxygen needed to germinate.
- Lack of moisture: Seeds need to be kept moist during the germination process, so if they dry out, they may not be able to sprout.
- Incorrect temperature: Different seeds have different temperature requirements for successful germination. If the temperature is too low or too high, the seeds may not germinate.

5. Lack of light: Some seeds require light to germinate, so if they are planted too deep or in a dark area, they may not sprout.
6. Soil conditions: If the soil is too compacted, contains too much clay or sand, or lacks nutrients, the seeds may not be able to germinate.
7. Pests and diseases: Pests and diseases can damage seeds and prevent them from germinating.
8. Competition: If seeds are planted too close together, they may compete for resources and not be able to germinate.
II. Seeds Not Germinating? Try These Fixes to Get Your Garden Growing
1. Choose High-Quality Seeds
You can also narrow down your search for high-quality seeds by choosing the type of seeds you want to grow. For example, flower seeds and vegetable seeds require different conditions for optimal germination, so it's important to choose seeds that are specifically meant for the type of plant you want to grow. Whether you're planting a beautiful flower garden or a bountiful vegetable patch, selecting the right type of seed is crucial for a successful growing season.
2. Store Seeds Properly
Proper storage is essential for maintaining seed viability and germination rates. Seeds should be stored in a cool, dry place, away from direct sunlight and moisture.
Many gardeners use airtight containers or seed packets stored in a refrigerator or freezer to keep their seeds fresh and viable for longer periods. Just be sure to label and date your seed containers, and allow seeds to come to room temperature before planting.

3. Scarification and Stratification
Some seeds have a hard outer shell that can prevent water and oxygen from penetrating and triggering germination. Scarification is the process of breaking or weakening this outer shell to promote germination. This can be done by rubbing the seeds gently with sandpaper or nicking them with a knife, depending on the size and hardness of the seed.
Stratification, on the other hand, is the process of exposing seeds to cold temperatures to simulate winter conditions and encourage germination. This can be done by placing seeds in the refrigerator or a moist, cool environment for several weeks before planting.
4. Pre-Soak Seeds
Pre-soaking seeds can help speed up the germination process and soften hard outer shells. This is especially useful for seeds that require warm temperatures to germinate, such as beans or peas. To pre-soak seeds, simply place them in a jar or container with water for several hours or overnight, and then drain the water before planting.
III. Proper Planting Techniques to Improve Germination
1. Choose the Right Soil
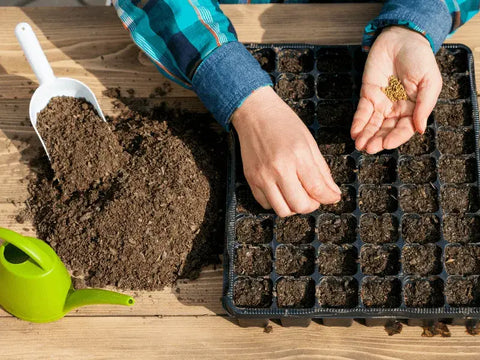
The type of soil you use can greatly affect the germination of your seeds. Make sure to choose soil that is loose, well-draining, and rich in nutrients. Avoid using heavy clay soils or soil that is too sandy.
2. Plant at the Right Depth
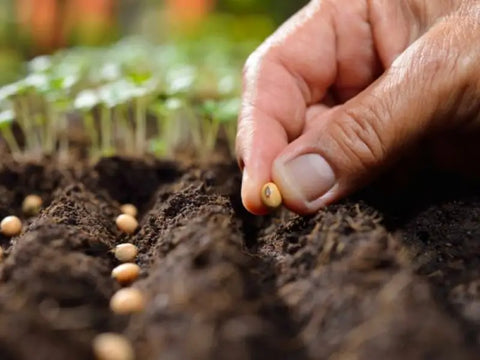
Planting seeds at the correct depth is crucial for proper germination. As a general rule, plant seeds at a depth that is twice the width of the seed. This ensures that the seed has enough access to moisture and oxygen.

3. Water Consistently
Seeds need consistent moisture to germinate. Make sure to water the soil regularly, but not excessively, to prevent the soil from drying out or becoming waterlogged. A good rule of thumb is to keep the soil evenly moist, but not saturated.
4. Provide Adequate Light
Most seeds require adequate light to germinate, although some may require darkness. Be sure to read the specific instructions for the type of seed you are planting and provide the appropriate amount of light. If planting indoors, consider using grow lights to ensure the seeds get enough light.
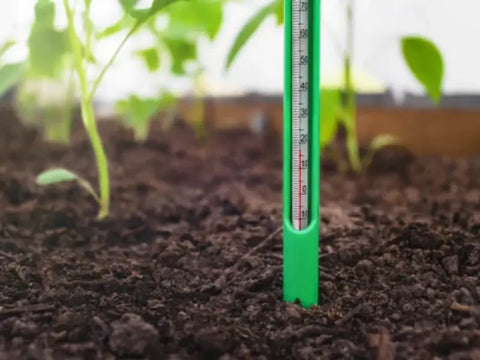
5. Keep the Soil Warm
Seeds require warm soil to germinate. Make sure to plant seeds during the appropriate season or use techniques such as using a heating mat or placing the seed tray in a warm location to maintain the necessary temperature.
IV. Tips for Caring and Saving Seeds for Future Planting Seasons
V. Conclusion
Remember, with a little patience and know-how, you can achieve a successful garden harvest. So, Are Seeds Not Germinating? Try These Fixes and happy gardening! And if you need some reliable seeds, be sure to check out The Rike for a wide selection of top-notch seeds that are sure to grow into healthy, thriving plants.


Leave a comment