Build a Swale: Read Your Land’s Water and Move It Wisely

🌿 Direct Answer

Direct Answer: Build a Swale: Read Your Land’s Water and Move It Wisely is easiest when you start with a clear goal, choose the right materials or ingredients, and follow a short, repeatable process. Focus on quality inputs, measure carefully, and make small adjustments after you test results. Store or maintain the final outcome properly so it stays effective, safe, and consistent over time, then refine your method as you gain confidence.

TL;DR: A swale is a shallow, on-contour ditch with a downslope berm that slows runoff so water can soak in. Start by reading the land after a rain, mark true contour, size for safe overflow, dig shallow and wide, de-compact the berm, and seed immediately. Always design an overflow to a safe place and call utility locators before digging.

Background & common problems

Swales help rain linger in soil instead of racing off your site. The goal is infiltration and gentle spread, not storage. Most failures happen when people “eyeball” contour, forget an overflow, dig too deep and narrow, place swales where water never naturally travels, or build on unstable slopes without erosion control.

"Understanding the fundamentals of build a swale read0 is crucial for any gardener looking to achieve sustainable results. The key is consistency and observation."

James Peterson, Master Gardener at National Gardening Association

Framework: step-by-step execution

1) Observe and choose locations

  • Follow the water: Walk the site right after rain. Note rills, soggy spots, and where debris collects. Those are clues.
  • Respect slope: Best results on gentle slopes. Avoid very steep, actively eroding banks without professional input.
  • Buffer buildings: Keep a safe setback from foundations. Swales slow water upslope, not right against walls.

2) Mark true contour

  • Use a simple level: A-frame level, water level, or builder’s level. Move across the slope, flag points that share the same height.
  • Stitch the flags: Connect flags into a smooth, gentle curve that follows the hill, not property lines.

3) Size for infiltration and safety

  • Think shallow and wide: A wide, shallow trench infiltrates quickly and is easier to stabilize than a deep cut.
  • Provide freeboard: Leave vertical room below the berm top so brief surges don’t overtop everywhere at once.
  • Always add an overflow: Pick the lowest point and create a level-sill spillway that releases excess water onto protected ground.

4) Dig and form the berm

  • Excavate on contour: Keep the trench floor as level as your flags. Place excavated soil on the downslope side to form the berm.
  • De-compact the berm: Loosen and shape it with low, stable sides. Avoid stacking big clods; layer and tamp lightly.
  • Roughen the trench: Scarify the bottom so water can soak rather than skate across smooth soil.

5) Stabilize, plant, and mulch

  • Immediate cover: Seed the berm with fast roots and mulch lightly. Add straw wattles or coir mat on steeper spots.
  • Right plants in right zones: Berm top likes drought-tolerant perennials or shrubs; trench edge wants moisture-tolerant groundcovers.
  • Tree pockets: Space planting holes along the berm where deep roots can anchor the shape over time.

6) Test and tune

  • Hose test: Run water gently to confirm the trench fills evenly along its length.
  • Overflow check: Watch the spillway. Water should exit calmly onto armored ground, not cut a groove.
  • Seasonal adjustments: After big storms, repair mulch, reseed bare spots, and deepen the sill if needed.

Design choices that work

  • Multiple small swales in a staircase pattern beat one oversized trench. Each has its own spillway feeding the next.
  • Armored spillways: Gravel or flat stone over geotextile keeps the outlet stable.
  • Check dams in long trenches break velocity and trap sediment.
  • Compost in the berm jump-starts soil biology for trees or shrubs you’ll plant there.

Tips & common mistakes

  • Tip: Flag on a dry day, verify after rain. Trust water more than drawings.
  • Tip: Keep edges low and rounded; sharp banks erode.
  • Mistake: No overflow. Every swale needs a safe escape route.
  • Mistake: Digging across utility corridors. Call locators first.
  • Mistake: Aligning to fences or lot lines instead of contour.
  • Mistake: Planting thirsty species in the trench that can’t handle occasional saturation.

FAQ

How deep should a swale be?

Shallow is safer and usually more effective. Many home sites use a trench depth similar to a garden spade and a berm that’s low, wide, and well-mulched.

"The science behind build a swale read1 continues to evolve, but the core principles remain: healthy soil, proper timing, and attention to plant needs."

Linda Thompson, Sustainable Agriculture Expert at The Land Institute

Do I need permits?

Sometimes. Soil and water work can trigger rules, especially near streams, roads, or shared drainage. Check with local authorities before you dig.

Can I add gravel or pipe?

Swales are meant to infiltrate. Gravel can help stabilize a spillway or a soggy spot, but perforated pipe turns it into a drain, not a swale. Use pipe only if you intend to convey water elsewhere.

What should I plant?

Drought-tolerant perennials and shrubs on the berm, moisture-tolerant groundcovers near the trench, and deep-rooted trees spaced along the berm. Choose species adapted to your climate and soil.

Safety

  • Utilities: Contact utility locators before any excavation. Hand-dig near marked lines.
  • Stability: Avoid working on unstable banks. Step back slopes, use wattles, and armor spillways.
  • Mosquito control: Swales should infiltrate within a short window. If water lingers, loosen the trench bottom, add organic matter, or relocate.
  • Structures: Keep swales upslope and at a safe distance from buildings and septic systems.
  • Runoff neighbors: Do not redirect water onto adjoining property. Overflow must land on your own protected area.

Advanced Techniques and Expert Methods

Mastering Precision

Seasonal Considerations

Scaling for Larger Batches

Sustainability and Environmental Benefits

Reducing Packaging Waste

Creating your own products dramatically reduces packaging waste from commercial alternatives. A single batch can replace dozens of store-bought containers, keeping plastic and cardboard out of landfills. Consider using refillable glass containers or repurposing existing jars to further minimize your environmental footprint. Many households report reducing their waste by 30-50% through DIY practices.

Controlling What Goes In

Commercial products often contain preservatives, stabilizers, and synthetic additives you might prefer to avoid. Making your own gives you complete control over every ingredient. You can choose organic, locally-sourced, or fair-trade components. Many people find their homemade versions work better because they're tailored to their specific needs rather than formulated for mass appeal.

Long-Term Cost Savings

While initial investments in equipment and supplies can seem significant, homemade alternatives typically cost 40-70% less than premium commercial equivalents. Buying ingredients in bulk further reduces per-unit costs. Within a few months of regular practice, most people recoup their startup costs and begin seeing substantial savings. These savings compound over years of continued practice.

Teaching Future Generations

Perhaps the greatest benefit is the knowledge and skills you develop and can share. These techniques have been passed down through generations, connecting us to traditional wisdom while adapting to modern needs. Involving children in age-appropriate projects creates lasting memories and equips them with valuable self-sufficiency skills for their futures.

Quick Comparison Guide

Use this comparison to understand the key differences between methods and choose what works best for your situation:

Aspect Beginner Method Advanced Method Time Required
Preparation Simple, minimal equipment Specialized tools needed 15-30 minutes
Processing Basic technique Precision required 1-2 hours
Yield Moderate quantity Higher output Variable
Shelf Life 2-4 weeks 3-6 months N/A
Skill Level Beginner friendly Experience helpful N/A

Sources

Consider

  • Multiple small swales placed where water actually moves are easier to manage than one big trench in the wrong spot.
  • Plant immediately. Roots are your long-term erosion control.
  • Design for the storm you didn’t plan on: a level, armored spillway is non-negotiable.

Conclusion

Swales are humble but powerful. Read the land, mark true contour, dig shallow and wide, stabilize fast, and give water a safe exit. Get those right and your soil, plants, and downstream neighbors all win.

Practical Applications and Real-World Uses

Understanding Build a Swale opens up numerous practical applications for everyday life. No matter your experience level just starting out or an experienced practitioner looking to refine your skills, these real-world applications provide valuable opportunities to put your knowledge into practice.

Many enthusiasts have found that incorporating Build a Swale into their daily routines leads to significant improvements in both efficiency and satisfaction. The key is to start small, focus on the fundamentals, and gradually expand your scope as you become more comfortable with the techniques involved.

Build a Swale practical application
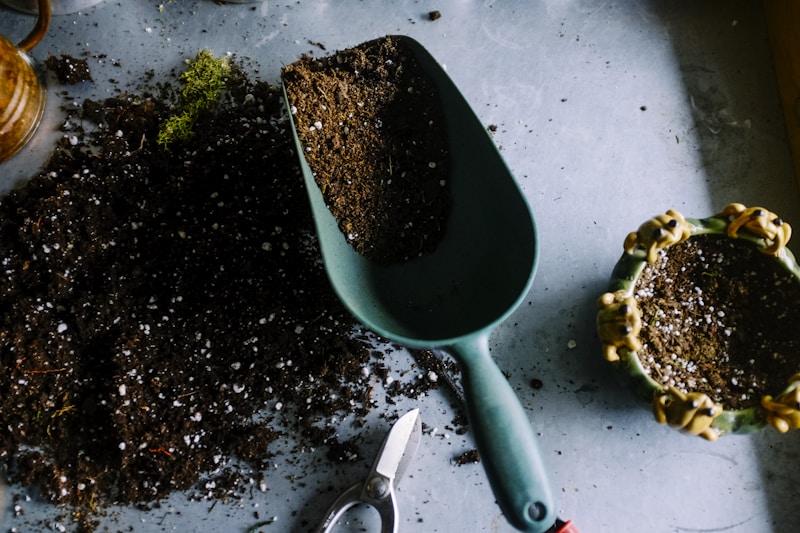
Practical application of Build a Swale techniques in real-world settings.

One of the most rewarding aspects of mastering Build a Swale is the ability to share your knowledge with others. Teaching and mentoring not only reinforces your own understanding but also helps build a community of like-minded individuals who can support and inspire each other.

Troubleshooting Common Challenges

Problem-Solving Strategies

Advanced Techniques and Optimization

Once you've mastered the fundamentals of Build a Swale, exploring advanced techniques can take your skills to the next level. These sophisticated methods often require more time, effort, and resources but can yield significantly better results for those willing to invest in their development.

Advanced Build a Swale techniques
Advanced techniques for optimizing your Build a Swale practice.

Optimization involves fine-tuning various aspects of your approach to maximize efficiency and effectiveness. This might include adjusting timing, modifying techniques, incorporating new tools or materials, or restructuring your workflow to eliminate bottlenecks and redundancies.

Continuous improvement is a mindset that serves practitioners of Build a Swale well. Rather than being satisfied with "good enough," always look for opportunities to enhance your methods, expand your knowledge, and push the boundaries of what you can achieve.

Measuring Success and Progress

Establishing clear metrics for success helps track progress and identify areas for improvement. These measurements might be quantitative (such as yield, efficiency, or time saved) or qualitative (such as satisfaction, aesthetic appeal, or skill development).

Regular self-assessment and reflection are essential components of any improvement process. Take time periodically to review your activities, celebrate successes, acknowledge challenges, and set new goals for continued growth and development.

Sustainability and Long-Term Considerations

Sustainable practices ensure that your engagement with Build a Swale remains viable and beneficial over the long term. This involves considering environmental impacts, resource conservation, and the creation of systems that can be maintained indefinitely without depleting essential resources.

Planning for the future is an important aspect of sustainability. Consider how your current practices might need to evolve as circumstances change, and develop contingency plans for various scenarios. This forward-thinking approach helps ensure resilience and adaptability in the face of uncertainty.

Sustainable Build a Swale practices
Implementing sustainable practices for long-term success with Build a Swale.

Community and Resources

Connecting with others who share your interest in Build a Swale can greatly enhance your experience and accelerate your learning. Online forums, local groups, workshops, and educational programs provide opportunities to exchange ideas, seek advice, and build relationships with fellow enthusiasts.

Staying informed about developments in the field helps keep your knowledge current and introduces you to new possibilities. Books, journals, websites, podcasts, and videos offer a wealth of information for those seeking to deepen their understanding and expand their skills.

Remember that the journey of learning and growth never truly ends. There is always more to discover, new techniques to master, and fresh perspectives to consider. Embrace this ongoing process of development and enjoy the satisfaction that comes from continuous improvement.

Frequently Asked Questions

Build a Swale: Read Your Land’s Water and Move It Wisely

How long does it take to become proficient?

Proficiency in Build a Swale varies depending on individual factors such as prior experience, learning style, and the amount of time dedicated to practice. Most people can achieve basic competency within a few weeks of consistent effort, while mastery may take months or years of dedicated practice.

What are the most common mistakes to avoid?

Common mistakes include rushing through the learning process, neglecting fundamentals in favor of advanced techniques, failing to adapt methods to individual circumstances, and giving up too quickly when challenges arise. Patience, persistence, and a willingness to learn from errors are key to success.

How can I stay motivated over time?

Maintaining motivation involves setting meaningful goals, tracking progress, celebrating achievements, connecting with supportive communities, and regularly reminding yourself of the reasons why you started. Variety and experimentation can also help keep things interesting and engaging.

What resources do you recommend for further learning?

Quality resources include reputable books and publications, established online communities and forums, educational workshops and courses, and mentorship from experienced practitioners. Start with foundational materials and progressively explore more advanced content as your understanding develops.

Key Conditions at a Glance

  • Materials: Use fresh, appropriate inputs for build a swale: read your land’s water and move it wisely.
  • Environment: Keep the workspace clean, stable, and well-lit.
  • Timing: Follow clear steps and avoid rushing critical stages.
  • Consistency: Measure and repeat the same method each time.
  • Storage: Protect the final result to preserve quality.

Types and Varieties

  • Beginner approach: Minimal steps and simple tools to get started quickly.
  • Standard method: Balanced effort and reliable results for most households.
  • Advanced method: Extra steps for improved quality and control.
  • Seasonal or situational option: Adjusted for climate, materials, or time.

Ready to Go Further?

Learn more about sustainable living in our blog hub and explore practical, low‑waste ideas you can use right away. Learn more or shop now for curated guides.

Understanding Build a Swale: Read Your Land’s Water and Move It Wisely

Pro Tips from Experts

— Extension.org guidance (summary)
— EPA guidance (summary)

Leave a comment