

Natural dye reference: fiber prep, color sources, mordants, and fast troubleshooting
Intent: give makers a compact, reliable reference for natural dyeing that actually produces repeatable color. Benefit: clear fiber prep steps, beginner-safe mordants, plant sources, pH tricks, safety rules, and a troubleshooting map.
Why this reference matters
Natural dyes can be luminous or muddy. The difference is usually prep and process: clean fibers, accurate ratios, heat control, and simple record-keeping. This guide keeps decisions short and repeatable so your swatches become a library you can trust.
Fiber first: match method to material
- Cellulose fibers (cotton, linen, hemp): need thorough scouring and a mordant system that includes tannin before alum for best depth.
- Protein fibers (wool, silk): scour gently; alum works well without a separate tannin step for many recipes.
- Synthetics & blends: natural dyes have poor uptake on synthetics; high natural-fiber blends do better.
Prep and mordants that work
Scour (clean) the fiber
- Cotton/linen: hot wash with a neutral detergent and a pinch of soda ash; rinse until water runs clear.
- Wool/silk: warm water with neutral soap; avoid agitation and big temperature swings to prevent felting.
Mordant basics
- Alum for protein fibers: common starting point for bright, lightfast color on wool and silk.
- Tannin + alum for cellulose: a light tannin bath (for example, gallnut, myrobalan) followed by alum helps dyes bond to cotton and linen.
- Iron as modifier: small amounts shift colors darker or moodier; use sparingly to avoid fiber damage.
- Avoid heavy-metal mordants for home use: skip methods that rely on chrome or tin in a home studio.
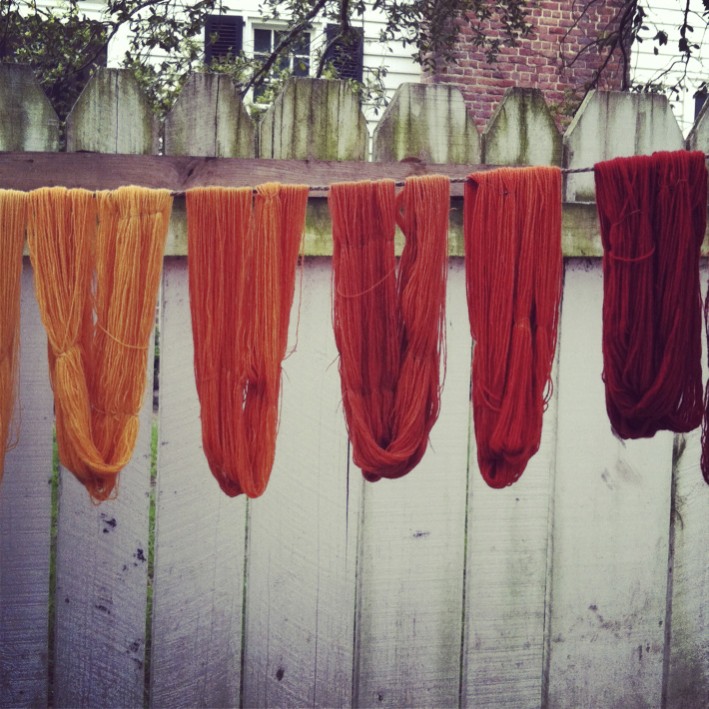
Color sources: quick picks that behave
- Madder roots: warm reds to corals on alum-mordanted fibers; richer with calcium present.
- Cutch: caramel to brown; easy, reliable, and layer-friendly.
- Weld or marigold: clear yellows; great mixers for green or orange blends.
- Indigo: the non-mordant exception; needs a reduced vat (fructose, henna, or other systems). Dip, air, repeat.
- Logwood: purple to gray; sensitive to pH and iron, so sample first.
- Avocado pits/skins: soft peach to dusty pink on cellulose with tannin plus alum; color varies widely.
- Black tea or pomegranate rind: gentle tannin sources that shift tone and help on cellulose.
pH and modifiers: small changes, big shifts
- Acid shift (a little citric acid or vinegar): often brightens yellow ranges, can warm some reds.
- Alkaline shift (a little soda ash or washing soda): can push yellows toward green, increase uptake for some dyes; go gentle on wool.
- Iron bath (very dilute): saddens hues toward olive, slate, or charcoal; quick dips are usually enough.
Process framework: scour → mordant → dye → modify → rinse → cure
- Weigh goods: record weight of fiber; base all additions on this.
- Scour: clean as above; rinse thoroughly.
- Mordant: prepare an appropriate bath; keep temps steady and avoid boiling protein fibers.
- Dye: strain plant solids if needed; add well-wetted fibers; bring to working temp and hold with gentle movement.
- Modify: test a swatch in separate jars for pH or iron shifts before committing the whole batch.
- Rinse and cure: cool slowly, rinse to near-clear, then hang or lay flat. Many colors settle and deepen after a short rest.
Troubleshooting: symptom → likely cause → quick fix
- Pale, uneven color: poor scouring or rushed mordant. Fix: re-scour; repeat mordant with good agitation.
- Muddy mixes: throwing many plant sources together. Fix: layer one dye at a time; sample before combining.
- Patchy indigo: vat not reduced or fabric not fully wetted. Fix: check reduction, de-bubble surface, wet out thoroughly, dip briefly, oxidize, repeat.
- Fiber feels harsh: strong alkali or long iron soak. Fix: reduce alkali strength; keep iron dips short and well diluted.
- Color washes out fast: weak bond or no mordant where needed. Fix: confirm fiber type, use tannin plus alum on cellulose, avoid over-soaping first wash.
Swatch discipline that pays off
- Label each swatch with fiber type, mordant, dye, weight of goods, ratio, temp window, and any modifiers.
- Dry-down can shift color; judge after full dry and a day of rest.
- Keep a ring or binder so future projects start from known results.
Methods, assumptions, limits
- Methods: home-scale, water-bath dyeing with food-safe stainless or dedicated enamel vessels; reduced indigo vat for blue.
- Assumptions: clean, soft to moderate water; stable heat source; access to basic PPE.
- Limits: plant materials vary by source; exact shade control requires sampling and notes rather than fixed recipes.
FAQ
Can I use kitchen pots?
Dedicate pots and tools to dye work only. Keep dye gear separate from food prep to reduce exposure and cross-contamination.
Do I need to pre-wash store-bought fabric?
Yes. Remove sizing and finishes so dyes can bond. Expect a visible improvement in depth and evenness after proper scouring.
How do I improve lightfastness?
Start with well-known, tested dyes, choose the right mordant system, and avoid harsh detergents in early washes. Store textiles away from direct sun.
Safety
- PPE: wear gloves and eye protection; avoid breathing powders; work with good ventilation.
- Separate gear: use dedicated dye pots, spoons, buckets, and strainers. Do not repurpose for cooking.
- Chemicals: measure carefully; label jars; never mix unknowns; keep acids and alkalis out of children’s reach.
- Water & disposal: strain solids, compost plant matter if appropriate, and dispose of spent baths per local guidance; keep heavy-metal mordants out of home studios.
- Skin & respiratory: some plants and modifiers can irritate skin or airways. Stop if you react and seek guidance if symptoms persist.
Sources
- Maiwa — Natural dyes overview (maiwa.com)
- Botanical Colors — Learn natural dyeing (botanicalcolors.com)
- Dharma Trading — Natural dye basics (dharmatrading.com)
- NC State Extension — Indigo fundamentals (ncsu.edu)
- OSHA — General chemical safety (osha.gov)
Further reading: The Rike: natural dye reference material
Related collection
Explore Related Collections
Browse culinary and botanical collections related to this topic.
Browse Ingredient CollectionsProducts and collections are presented for general ingredient, culinary, botanical, craft, or gardening use. Content on this site is educational only and is not medical advice.


Leave a comment